
Lost important files on your laptop and not sure how to get them back? This happens more often than one might think. Luckily, there are several easy ways to recover lost files, no matter how you lost them, and most of these methods are free. In this article, we’ll show you some of the best options, and you’ll definitely find at least one method that fits your situation.
Assess Your Chances to Handle Laptop Data Recovery
First, let’s talk about when it’s possible to recover lost data from your laptop – and when you might be out of luck.
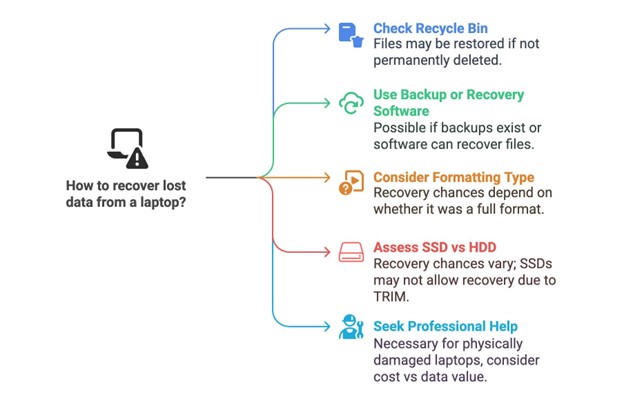
● If you deleted files yourself, they’re likely still in the Recycle Bin. Files stay there until they reach the storage limit or you empty it manually. When a file finds its way to the Recycle Bin, it has a second chance and can be restored to its original home (this doesn’t apply to files deleted from external storage devices, as they bypass the Recycle Bin and are permanently erased).
● If the Recycle Bin has been emptied or a Shift+Delete command was used, all is not necessarily lost. Files might still be recovered, provided a system backup exists from before their disappearance. Additionally, special data recovery programs can give you another option to get them back.
● If you formatted your system disk or reinstalled the system recovery depends on the type of formatting. If it wasn’t a full format (which overwrites all data), files can still be restored using backups or specialized recovery software.
● If you’re using an SSD or HDD, your chances of recovery vary. SSDs use the TRIM command to manage deletions, which makes file recovery impossible. HDDs, on the other hand, don’t use TRIM, meaning files have a better chance of being restored.
● If your laptop is physically damaged, whether from a drop, water spill, or other issues, data recovery is still possible, but DIY methods won’t help. This situation calls for expert help from data recovery services which might come with a high price. Reflect on whether the information lost holds enough significance to warrant the cost.
In the following sections of this article, we will concentrate on laptop data recovery methods that you can implement yourself.
3 Methods to Recover Lost Files from Your Laptop
Now that you roughly understand whether you have a chance to get your data back, below we will describe three methods on how you can do it depending on the reason for the loss.
Note that most laptops now feature SSDs, so after you discover that your data is missing, stop using your laptop immediately. Do not add any new files and start the recovery as quickly as possible. If you have an older laptop that still uses an HDD as a system drive, you may find it useful to review the additional guide on recovering data from a laptop hard drive, which describes methods that we will not cover in this article.
1. Check the Recycle Bin
If you deleted a file by accident and immediately realized it, then you don’t even have to worry, because this is the simplest case for recovering data on a laptop. You just need to find the Recycle Bin on your desktop and make a few clicks with the mouse or touchpad.
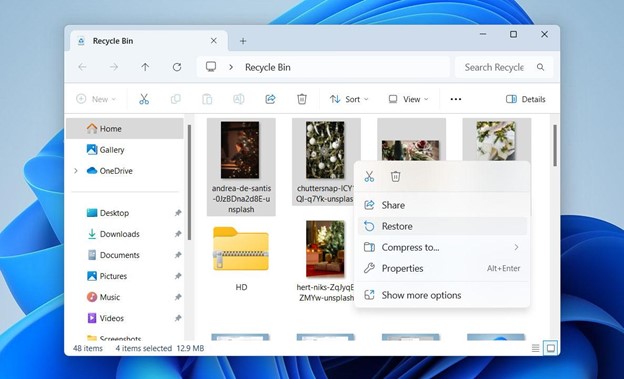
- To access the Recycle Bin, look for its symbol on the desktop and press it twice swiftly.
- Locate the file or files you wish to restore. You can sort the files by deletion date to find them more easily if your Bin contains many items.
- Once located, point to the desired file and press the right button on your pointing device.
- From the options that appear, choose “Restore”. This will place the file back where it existed before it was removed.
- Verify the file’s restoration by navigating to its original location.
If your data was lost some other way or isn’t in the Recycle Bin, your chances of recovery will vary, but they’re still not zero. Next, we’ll go over two options for these situations: data recovery software, and backups, which are always the most reliable way to recover data, no matter the device or scenario.
2. Use Data Recovery Software
Data recovery software is a great option for retrieving files that aren’t in the Recycle Bin. With their help, even shift-deleted files can be recovered or files that were lost as a result of formatting and other scenarios. These tools scan your system disk for file remnants and attempt to restore them. Here, we’ll take a look at two reliable data recovery software options.
Option A: Disk Drill
When it comes to laptop recovery tools, Disk Drill stands out as a highly capable option. Its flexibility also applies to its capacity to restore files from different storage conditions, but acting quickly remains important. With this software, it becomes easy to bring back any file, whether it is an image, video, document or another kind of data stored on the system drive. After finishing the scan, Disk Drill highlights the chance of recovery for each found file, which helps decide which ones to recover first.
- Visit the Disk Drill website and download the software. Note that you should not install it on the same drive from which you are trying to recover data.

- Open the program once the installation completes.
- Select the drive that contains the files you previously deleted and click “Search for lost data.”
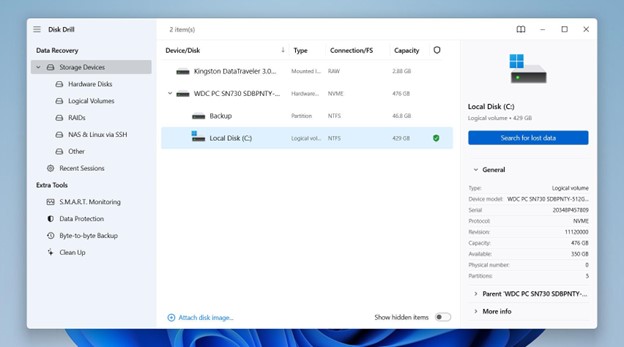
- Disk Drill will begin scanning your drive for deleted files. This process can take some time, depending on the drive size. Although you can preview found files in real-time, we suggest you wait until the scan completes before reviewing found items.
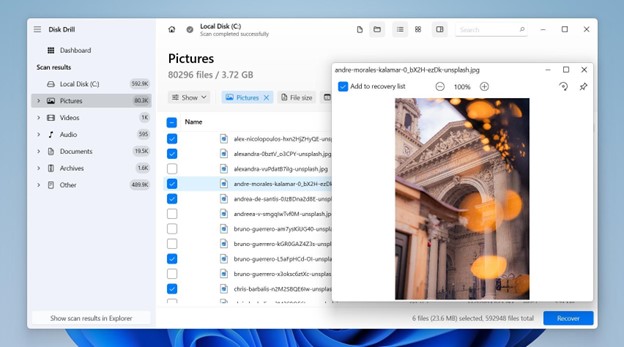
- After scan, click Review Found Items.
- To refine the search, apply filters reflecting what can be recalled about the file be it it size the date it was last changed or it title.
- A helpful feature in Disk Drill allows a quick glance at files through a preview option. Click on the small eye-shaped icon nearby to inspect the content if the name is not enough to identify it.
- Once you find the files you need, check the boxes next to them, then click Recover when you’re ready.
- Specify a recovery location different from their original location to avoid potential overwriting. Once you have selected the recovery destination, press “Next.”
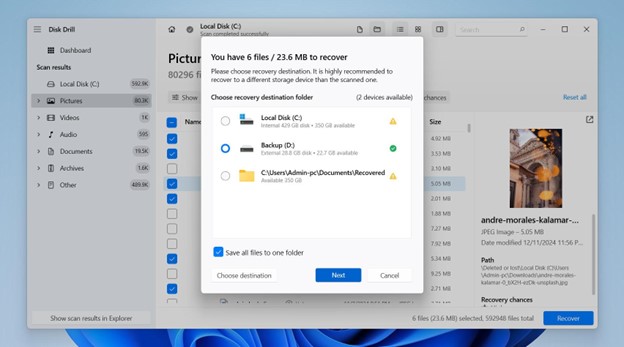
Disk Drill offers a complimentary chance to restore up to 500MB of data. This makes it handy for retrieving important documents or treasured images. For accessing file recovery without size restrictions, you should purchase the Pro version.
Option B: PhotoRec
For someone seeking cost-free data recovery, PhotoRec presents a good option. It exists in two forms. The first operates through a command line interface, which might feel unfamiliar or difficult to use for some. The second, called qPhotoRec, offers a graphical interface, although it carries a somewhat dated design. Additionally, when using this software, you cannot recover files selectively. That is, you can choose the file format for recovery, but you cannot select specific files among them; instead, you will need to search for them manually among all the results after recovery.
To make the guide understandable to everyone, we will show the use of the graphical version, qPhotoRec.
- Visit the TestDisk website and download the program archive, which includes qPhotoRec.
- Save the archive to your computer and extract it to a folder of your choice, but avoid the drive from which you are trying to recover data to prevent potential overwriting of lost files.
- Open the extracted folder and launch qPhotoRec.
- Select the drive from which you need to recover data.
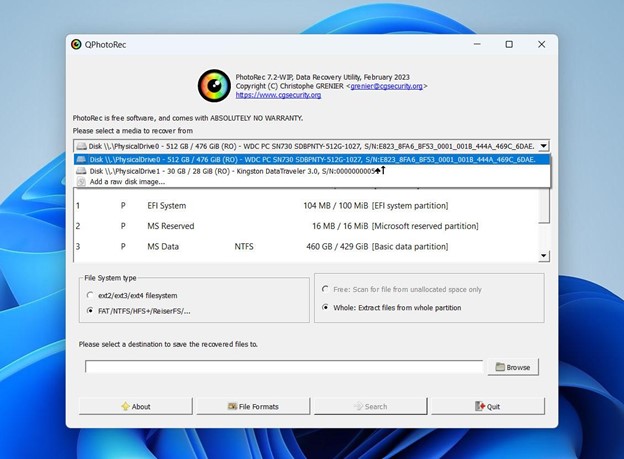
- Choose the filesystem type if known; if uncertain, qPhotoRec can auto-detect it for you.
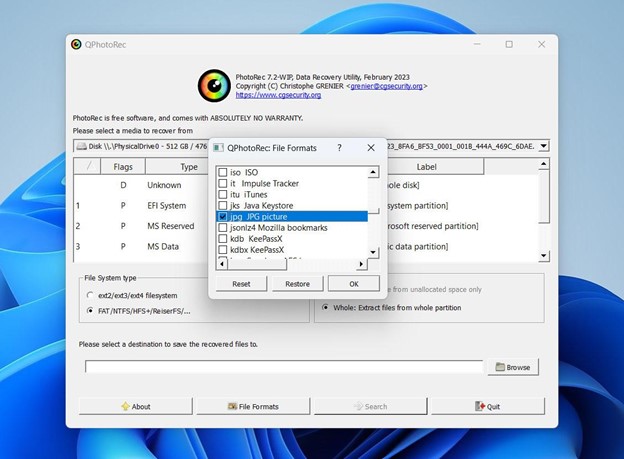
- Choose the file format needed for recovery from the available list of options provided.
- Select a destination for the recovered files. This should be a different drive to avoid overwriting any recoverable data.
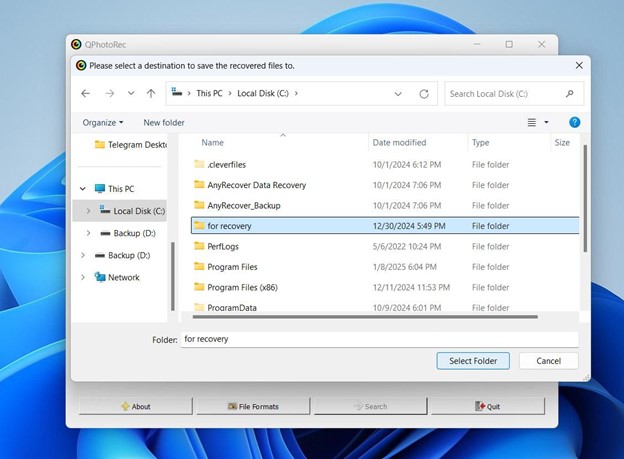
- Click ‘Search’ to begin the scanning process for recoverable files.
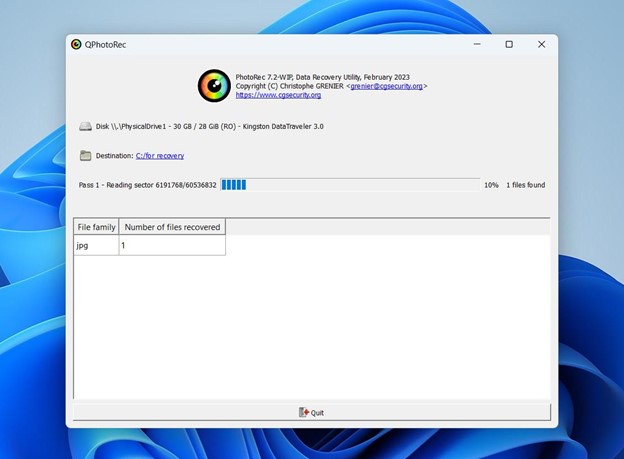
- After the scan completes, navigate to the destination folder to review and sort through the recovered files.
3. Restore Deleted Files From Windows Backups
And the last option for how you can perform recovery on a laptop is to restore data from existing backups. We will consider two options – local backup via File History and backup in the cloud through OneDrive, which functions more as synchronization than a full backup. Let’s move on to the explanation, as there are some nuances in each of them.
Option A: Use File History
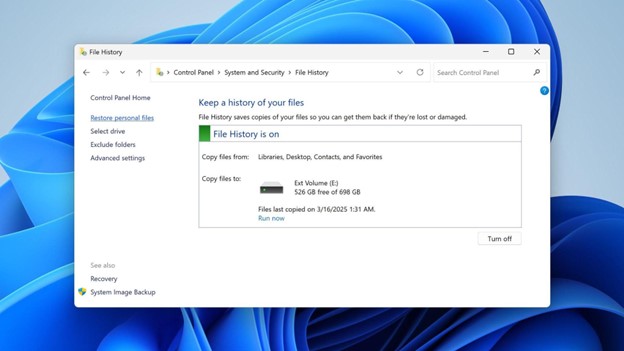
File History is a tool that creates backup copies of all files located in the Music, Photos, Videos, and Documents folders. If the data you lost was in any of these folders, and you have File History configured, then you have a 100% chance of getting it back.
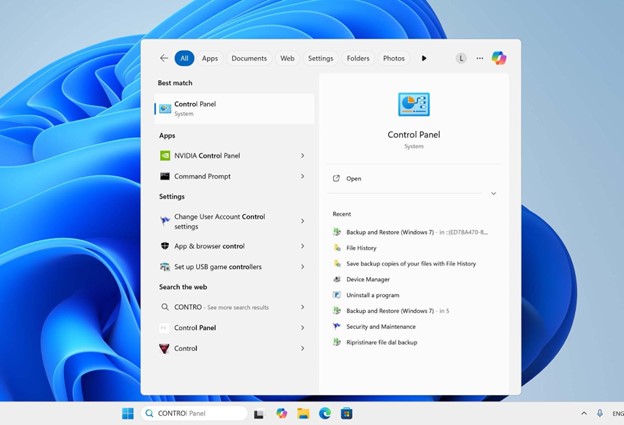
- Open the Control Panel on your Windows laptop.
- Connect the external drive or access the network location where your backups are stored, if not already connected.
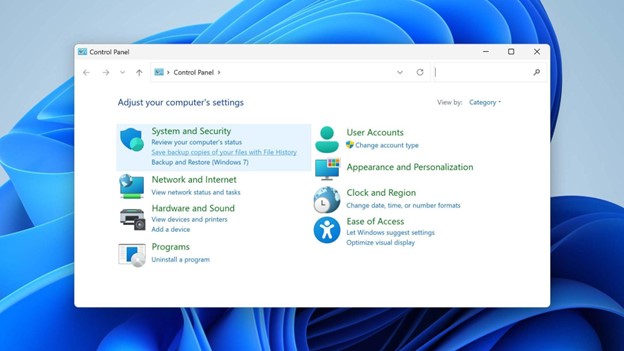
- Click on “System and Security” and select “File History.”
- Сlick Restore personal files on the left panel. This will launch a new window displaying your File History backups.
- Search for the backups to find the version of the folder or file you need.
- After identifying the right one, press “Restore” to move it to a different location, preventing any files on the system from being replaced.

- Confirm everything is correct and start the restoration process.
Option B: Use Cloud Backups with OneDrive
In this section, we will discuss OneDrive. Starting with Windows 10, when you install Windows, the OneDrive application also installs, so you might have activated it without realizing it, and your files could have been backed up there. However, OneDrive functions like synchronization – when you delete a file on your laptop, it also deletes from the OneDrive servers. Nevertheless, the file may still be in the OneDrive recycle bin, even if it is not in your local recycle bin. Therefore, it is worth visiting the site to check.
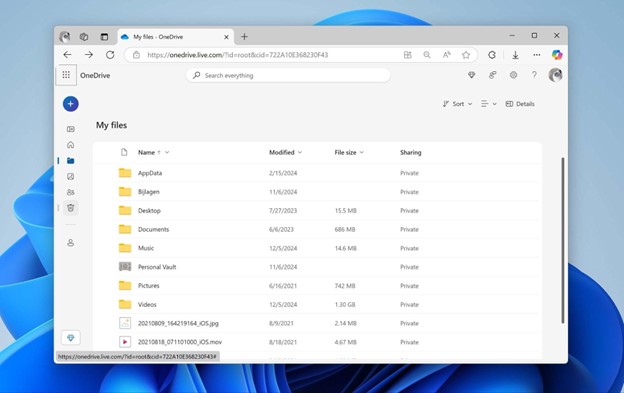
- Visit the OneDrive website and log in using the Microsoft account linked to the laptop.
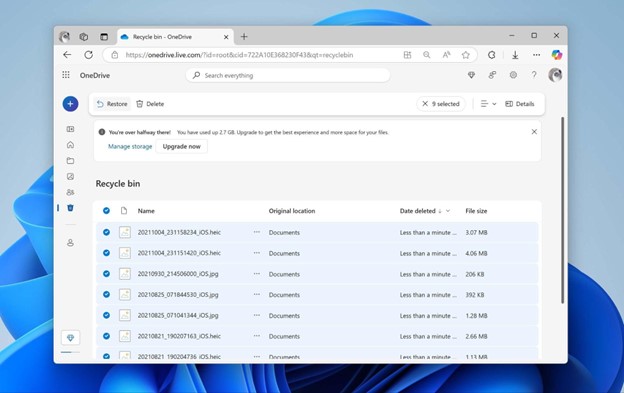
- Locate the section labeled ‘Recycle bin’ on the left panel. It holds deleted files from OneDrive.
- Scroll through the contents of the recycle bin to identify the needed file.
- After locating the file, mark it and press ‘Restore’. This action returns the file to it original spot within the OneDrive storage.
- To place the file on the laptop, sync the OneDrive folder or download the file directly from the OneDrive website.
Conclusion
If you think that data loss from a laptop is an irreversible problem, then this article should prove otherwise. We hope that you have found a method that will help you recover data from your laptop. The most reliable method is, of course, recovery using File History, but given that not everyone uses it, we would always advise starting with recovery using data recovery software. And most importantly – act quickly.