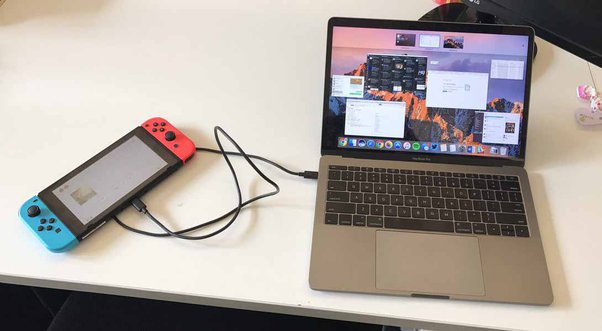
How to Connect Nintendo Switch to Laptop

The Nintendo Switch is one of the most popular gaming consoles on the market, allowing players to enjoy their favorite games at home and on-the-go. However, connecting your Nintendo Switch to your laptop opens up a whole new world of possibilities.
Not only can you play your favorite games on a larger screen, but you can also capture and stream gameplay footage, access cloud saves, and even use your laptop as a secondary display. With this powerful combination, you can take your gaming to the next level and enjoy a truly immersive experience. Therefore, here, we’ll help you connect your Nintendo Switch to your laptop.
Connect Nintendo Switch to the laptop:
We have mentioned two types of techniques that can help you with the matter. With the first being the simple HDMI cable connect method and the second one being the capture card procedure. We have explained how you could use the Elgato HD60X External capture card as it’s one of the best ones out there; however, you can use any other capture card if you like.
- Utilise HDMI cable:
To make the Nintendo Switch show up on your laptop screen, your notebook must have the capability to receive HDMI input. However, a hurdle in this regard is that contemporary laptops come with HDMI output ports, meaning they transmit HDMI signals rather than receive them.
Nevertheless, depending on what laptop you own, it could have an HDMI input port like Alienware gaming notebooks. On the contrary, you could also use an HDMI adapter which will resolve the input/output issue.
So, first, you may make sure that your laptop is equipped with an HDMI input port. Subsequently, link one end of the HDMI cable to your laptop and the other end to the dock of your Nintendo Switch. After turning on both your laptop and the Switch, the screen of the latter should appear on your laptop’s display.
- Elgato HD60X External Capture Card:
Follow the steps mentioned below to achieve a successful connection between your Nintendo Switch and laptop.
Check your System Requirements
Before you begin, make sure your laptop meets the system requirements for the Elgato HD60X External Capture Card. The card usually requires a minimum of 4GB RAM, a USB 3.0 port, and a 6th generation Intel Core i5 CPU or higher.
Connect the Elgato HD60X External Capture Card
Connect the Elgato HD60X External Capture Card to your laptop using the USB 3.0 cable provided. Ensure that the capture card is properly installed by checking your device manager.
Connect the Nintendo Switch
Connect your Nintendo Switch to the capture card using an HDMI cable. Plug one end of the HDMI cable into the Nintendo Switch’s HDMI output port and the other end into the capture card’s HDMI input port.
Connect to your Laptop
Connect the capture card to your laptop using another HDMI cable. Plug one end of the HDMI cable into the capture card’s HDMI output port and the other end into your laptop’s HDMI input port.
Configure the Elgato Software
Install the Elgato Game Capture software on your laptop and configure it to capture your Nintendo Switch gameplay. In the software settings, select the Elgato HD60X as your capture device and adjust the resolution and frame rate per your preference.
Start Playing!
Once you’ve completed the above steps, you can start playing and capturing your Nintendo Switch gameplay on your laptop. You can now share your gameplay with friends, record it for later viewing, or even live-stream it online. With the help of the Elgato Game Capture software, you can also add commentary or make other adjustments to your captured gameplay.
Final Thoughts:
Connecting your Nintendo Switch to your laptop is a great way to share your gameplay with others. Just follow the above steps, and you’ll be up and running in no time. Happy gaming!

