
How to Record MacBook Screen with Internal Audio
This is 2022, the peak era of advancement and information technology. Today when we go to Youtube, TikTok, Facebook, or any other social media or streaming site, we find thousands of gaming vlogs, reaction videos, tutorials, and whatnot. And all of this is accomplished by software applications that allow screen recording with microphone activation, so you can also record your voice with the video contents.
Being able to do this much is easy, and you can find Mac’s own screenshot utility or the QuickTime player. But when it comes to recording internal audio, which can be just as important as screen recording or webcam recording, to make a comprehensive video where you can show your screen, the internal audio, show yourself, and speak as well, you may need a program that allows everything. Let’s see how you can do all that.
1- Download Soundflower:
The soundflower is a system that works with the QuickTime player. So, installing and running soundflower will enable you to record the internal audio with the screen. So, once you complete the installation process, go to the MIDI setup via the search bar.
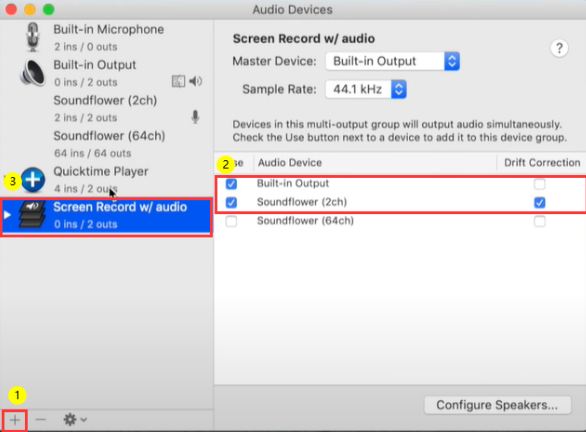
- Click on the (+) symbol present at the bottom left side of the window.
- Then create a multi-output device by selecting Build-in output and soundflower simultaneously.
- Remember that your master device should be set as the Build-in Output, and you can also rename the multi-output device. In the picture below, you can see it written as Screen Record w/ Audio.
- Go to “Sound” via the System Preferences and change the “Output” to the Multi-output device you created.
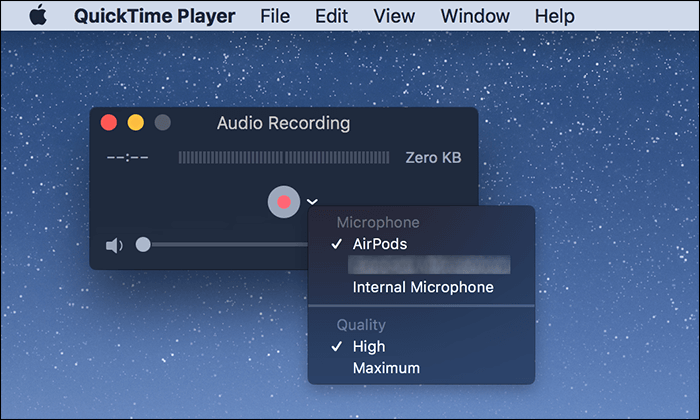
- You’re now good to start recording with the internal audio. Press Shift + Cmd + 5 to browse the QuickTime Player tools. Go to options and Select Microphone> Soundflower > record.
2- Record your screen, Microphone, internal audio, and yourself:
Many third-party apps like Camtasia, Movavi Screen recorder, iTop Screen recorder, OSB studio, and Loom allow creatives, influencers, and employees to record their MacBook’s screen, mic, internal audio, and webcam simultaneously.
So, it doesn’t matter if you want to make a quick weekly performance report using the Loom app or install the iTop screen recorder to make gaming vlogs or reaction videos; thanks to these easy-to-use applications with advanced features, you can do much more with your videos now.
FAQs
How to record the internal audio and Microphone voice simultaneously on Mac without a recording screen?
Firstly, you can use the Quicktime player to record the audio only without the screen. Secondly, you may download the Audacity player to record the internal audio and Microphone together. This player offers advanced settings to customize audio clips.
What’s the shortcut to stop recording on the QuickTime player?
You may press Cmd (⌘) + Ctrl + Esc to stop the recording and then save the clip by clicking on “File > Save.”
Final Thoughts:
You may see multiple software programs offer screen and audio recordings with several beneficial features today. While many have existed long before, newer apps come into the market now and then due to the increased demand, especially post Covid -19. Another factor, such as the common access to the internet everywhere and the popularity of vlogs and influencer marketing, also creates demand for such apps where you can create layered videos.